If you are new to Artlantis and the process to create renderings from a SketchUp model, this Tutorial will takes you through the basics and gets you ready to work on your own projects. The topics discussed are Importing a Sketchup file, Cameras, Sun, Materials, Environment, Lights and Render. This is a perfect primer for your Artlantis needs.
Tutorial Excerpt:
SketchUp to Artlantis

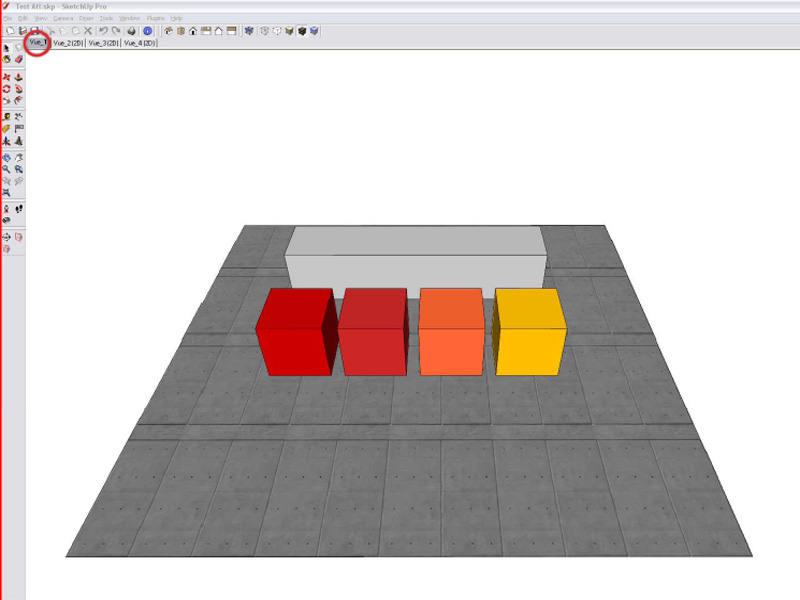
Let’s take a simple SketchUp model with some colored boxes, a plan and a texture…there you are, the stage is set.
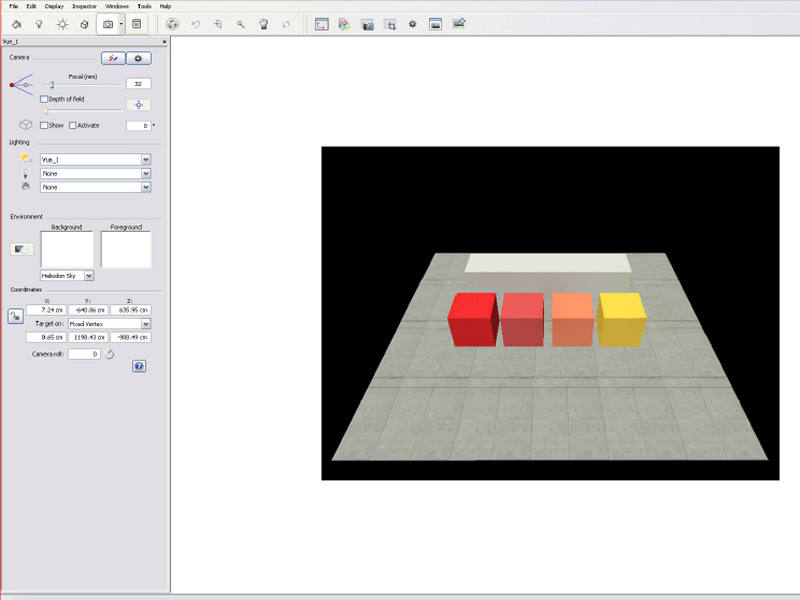
To import a SketchUp model into Artlantis, you just have to choose in the first window that pops up the skp. file type, and then the program will be able to load it directly. If everything has worked fine, you should be looking at something similar to the image below.
It is useful to keep in mind the fact that Artlantis separates the model file and the pictures (of the textures) when it saves (SketchUp puts everything together in a kind of archive). So if you don’t want to be surprised by a large amount of picture files around your model, just place it directly in a folder of it’s own, from the beginning and everything will be just fine.
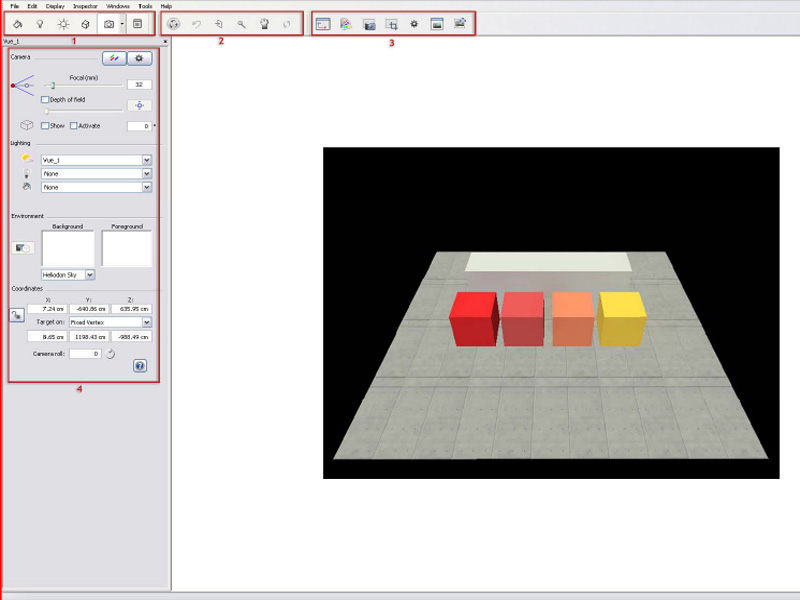
The software interface is, honestly, quite simple.
The right window shows a real-time preview of your render. Navigation inside this space is close to the SketchUp one.
There are four principal toolbar:
- Main setting categories (sun,cameras,materials…).
- Navigation tools (zoom,rotate…). The first button disables the realtime rendering, allowing quick manipulations of the model.
- Rendering and view options.
- Multipurpose toolbar, where all operations will be done. It changes according to the type of element selected (sun,materials…).
Later in the Tutorial:
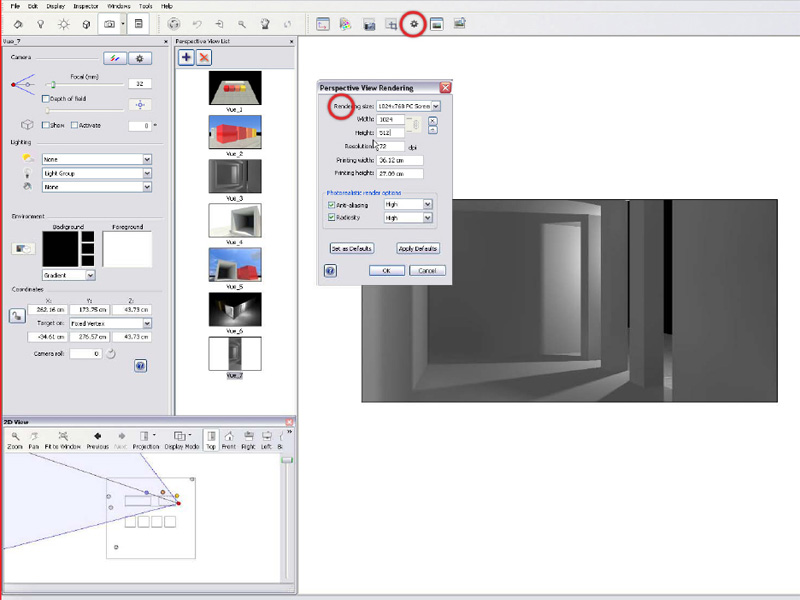
The model is now ready to be rendered and there’s just some general settings to adjust before it will be done.
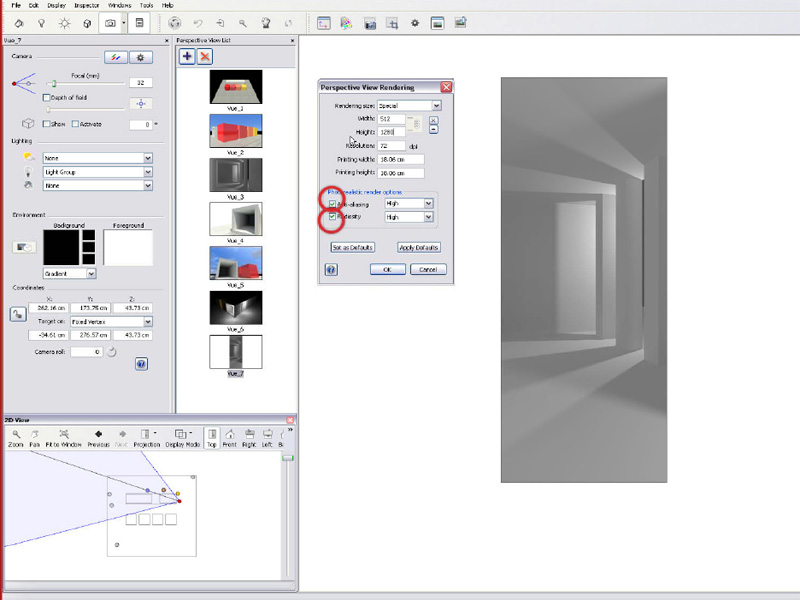
Through the settings tab it’s possible to change the rendering size, which will be adopted by the preview window, allowing a better framing of the render. The picture’s quality depends on its size but also on the calculation precision.
The main parameters are Anti-aliasing (‘sharpness ‘of the picture) and Radiosity (light calculation quality).
It’s then up to you to choose how to adjust them, regarding the time left for the rendering process.
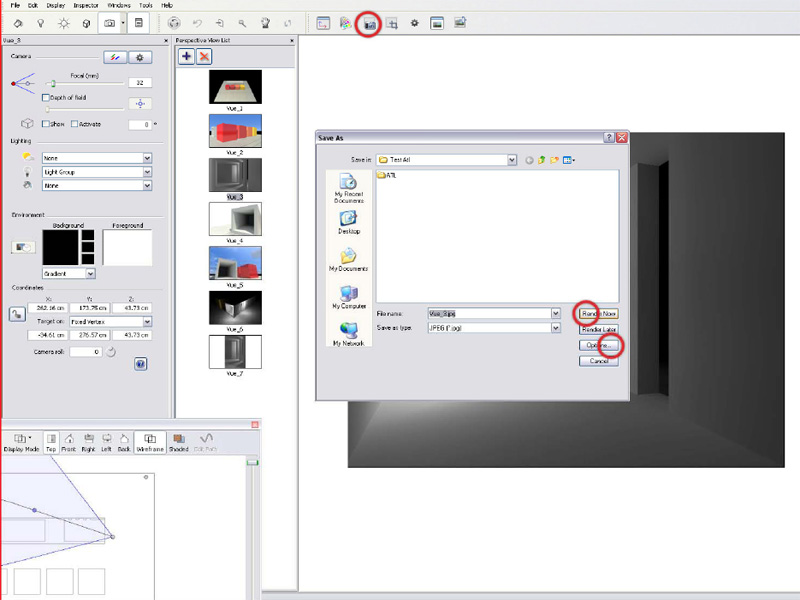
The render window asks you to save the picture, and allows a final settings adjustment before the last big step.
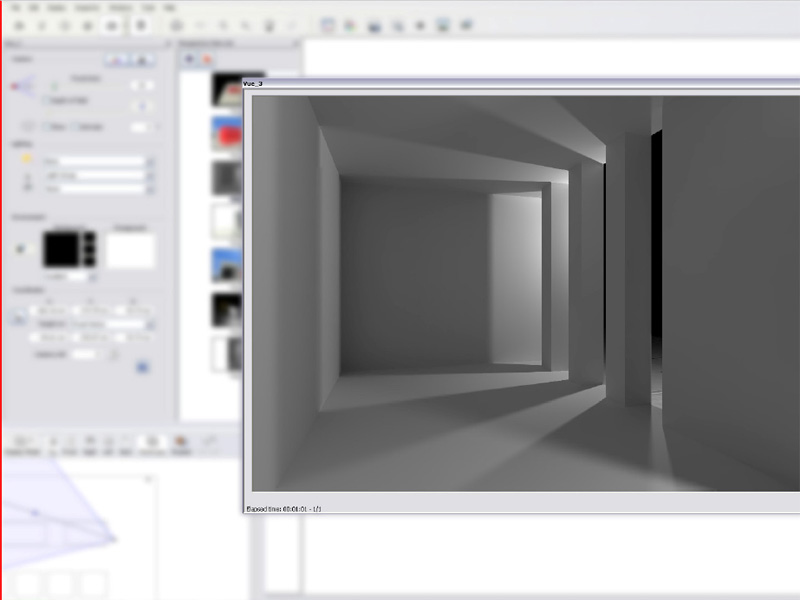
Well done! Now you just have to wait patiently for the result…


